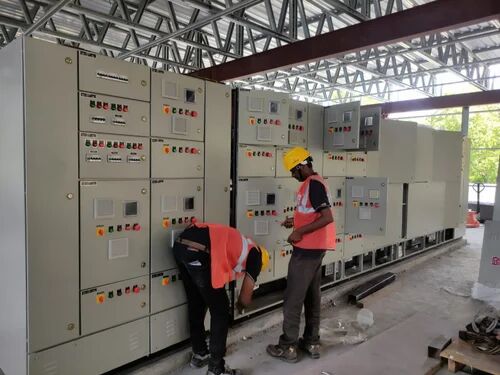
Installing an electrical panel is a critical process that requires a combination of skill, precision, and adherence to safety protocols. Whether you are upgrading an old panel or installing a new one, understanding the step-by-step process can help ensure a successful and safe installation. This guide will walk you through the essential steps involved in electrical panel installation, highlighting key considerations and best practices.
Understanding the Basics of Electrical Panels
Before diving into the installation process, it’s important to understand what an electrical panel is and its function. An electrical panel, also known as a breaker panel, distribution board, or load center, is a component of an electricity supply system that divides an electrical power feed into subsidiary circuits. It provides a protective fuse or circuit breaker for each circuit in a common enclosure.
Step 1: Planning and Preparation
Assessing Your Needs
The first step in the electrical panel installation process is to assess your needs. Determine the power requirements of your home or building and consider the type and size of the panel that will best suit these needs. It’s essential to ensure that the panel can handle the electrical load to prevent overloading and potential hazards.
Obtaining Permits
Electrical panel installation typically requires permits from local authorities. Check with your local building department to understand the specific requirements and obtain the necessary permits before proceeding with the installation.
Gathering Materials and Tools
Make a list of all the materials and tools you will need for the installation. This typically includes the electrical panel, circuit breakers, wire cutters, screwdrivers, a voltage tester, and safety gear such as gloves and goggles.
Step 2: Safety First
Turning Off Power
Safety is paramount when working with electricity. Before you begin the installation, ensure that the power supply to the area where you will be working is turned off. Use a voltage tester to confirm that there is no live current in the wires.
Wearing Protective Gear
Wear appropriate protective gear, including insulated gloves and safety goggles, to protect yourself from electrical shocks and other potential hazards.
Step 3: Removing the Old Panel
If you are replacing an old panel, the next step is to carefully remove it. Disconnect all the wires connected to the existing panel, taking note of where each wire is connected. Labeling the wires can help ensure that you connect them correctly to the new panel.
Step 4: Installing the New Panel
Mounting the Panel
Mount the new electrical panel in a suitable location. Ensure that the panel is securely attached to the wall and that there is sufficient space around it for ventilation and easy access.
Connecting the Main Power Line
Connect the main power line to the new panel. This step requires careful attention to detail, as incorrect connections can lead to serious electrical issues. Ensure that the connections are tight and secure.
Installing Circuit Breakers
Install the circuit breakers in the panel according to the manufacturer’s instructions. Each circuit breaker should correspond to a specific circuit in your home or building. Make sure that the breakers are properly rated for the electrical load they will be handling.
Step 5: Connecting the Wires
Connecting Ground and Neutral Wires
Connect the ground and neutral wires to their respective bus bars in the panel. These connections are crucial for the safe operation of your electrical system, as they provide a path for stray electrical current to be safely discharged.
Connecting Circuit Wires
Connect the individual circuit wires to the corresponding circuit breakers. Ensure that each wire is securely attached and that there are no loose connections. Double-check your work to make sure that all connections are correct.
Step 6: Testing the Installation
Inspecting the Panel
Before turning the power back on, conduct a thorough inspection of the panel to ensure that all connections are secure and that there are no visible issues. Check for any loose wires or components that may need tightening or adjustment.
Turning On the Power
Once you are confident that the installation is correct, turn the power back on. Start by turning on the main breaker, followed by the individual circuit breakers. Monitor the panel closely for any signs of trouble, such as tripped breakers or unusual noises.
Conducting Electrical Tests
Use a voltage tester to check the voltage at various points in the panel and throughout your home or building. This will help ensure that the panel is functioning correctly and that all circuits are receiving the appropriate amount of power.
Step 7: Final Steps and Documentation
Securing the Panel Cover
Once you have confirmed that the panel is working correctly, secure the panel cover. Make sure that all screws are tightened and that the cover is properly aligned.
Documenting the Installation
Keep a record of the installation, including the date, the work performed, and any observations or issues encountered. This documentation can be helpful for future reference and for any inspections or maintenance that may be required.
Scheduling an Inspection
Depending on local regulations, you may need to schedule an inspection by a qualified electrician or a local building authority to verify that the installation meets all safety and code requirements.
Conclusion
Installing an electrical panel is a complex task that requires careful planning, attention to detail, and strict adherence to safety protocols. By following this step-by-step guide, you can ensure a successful and safe installation. For those who are not comfortable with performing electrical work, it is always advisable to seek professional assistance from qualified electricians. For expert Electrical panel installation services in India, visit Manikaran.
Adhering to these steps and ensuring proper documentation and inspection will not only ensure the safety of your electrical system but also enhance its efficiency and longevity.

